Counterbore vs Countersink: Differences, Uses & How to Choose

A counterbore and a countersink are both recessed hole features used to seat fastener heads, but they have different shapes and purposes. A counterbore creates a cylindrical, flat-bottom recess, while a countersink creates a conical recess.

In most cases, use a counterbore for socket head cap screws that need to sit below the surface. Use a countersink for flat-head screws that need to sit flush with the surface.

Counterbore vs Countersink at a Glance

FeatureCounterboreCountersink
ShapeCylindrical recess with flat bottomConical recess
Typical FastenerSocket head cap screwFlat-head screw
Screw PositionUsually below the surfaceUsually flush with the surface
Main DimensionsDiameter and depthDiameter and angle
Bottom SurfaceFlatAngled
Typical Machining MethodEnd mill, counterbore tool, or interpolationCountersink or chamfer tool
Common UseMechanical assemblies, fixtures, machineryCovers, panels, aerospace parts, cosmetic surfaces
Main Design ConcernRemaining wall thicknessCorrect angle and depth

The biggest difference is the shape of the recess. This directly determines what type of screw can be used and how the screw head sits in the finished part.

What Is a Counterbore Hole?

A counterbore is a stepped hole with a larger cylindrical recess above a smaller drilled hole. The recess normally has straight walls and a flat bottom.

Its main purpose is to allow the head of a bolt or socket head cap screw to sit below or inside the surface of the part.
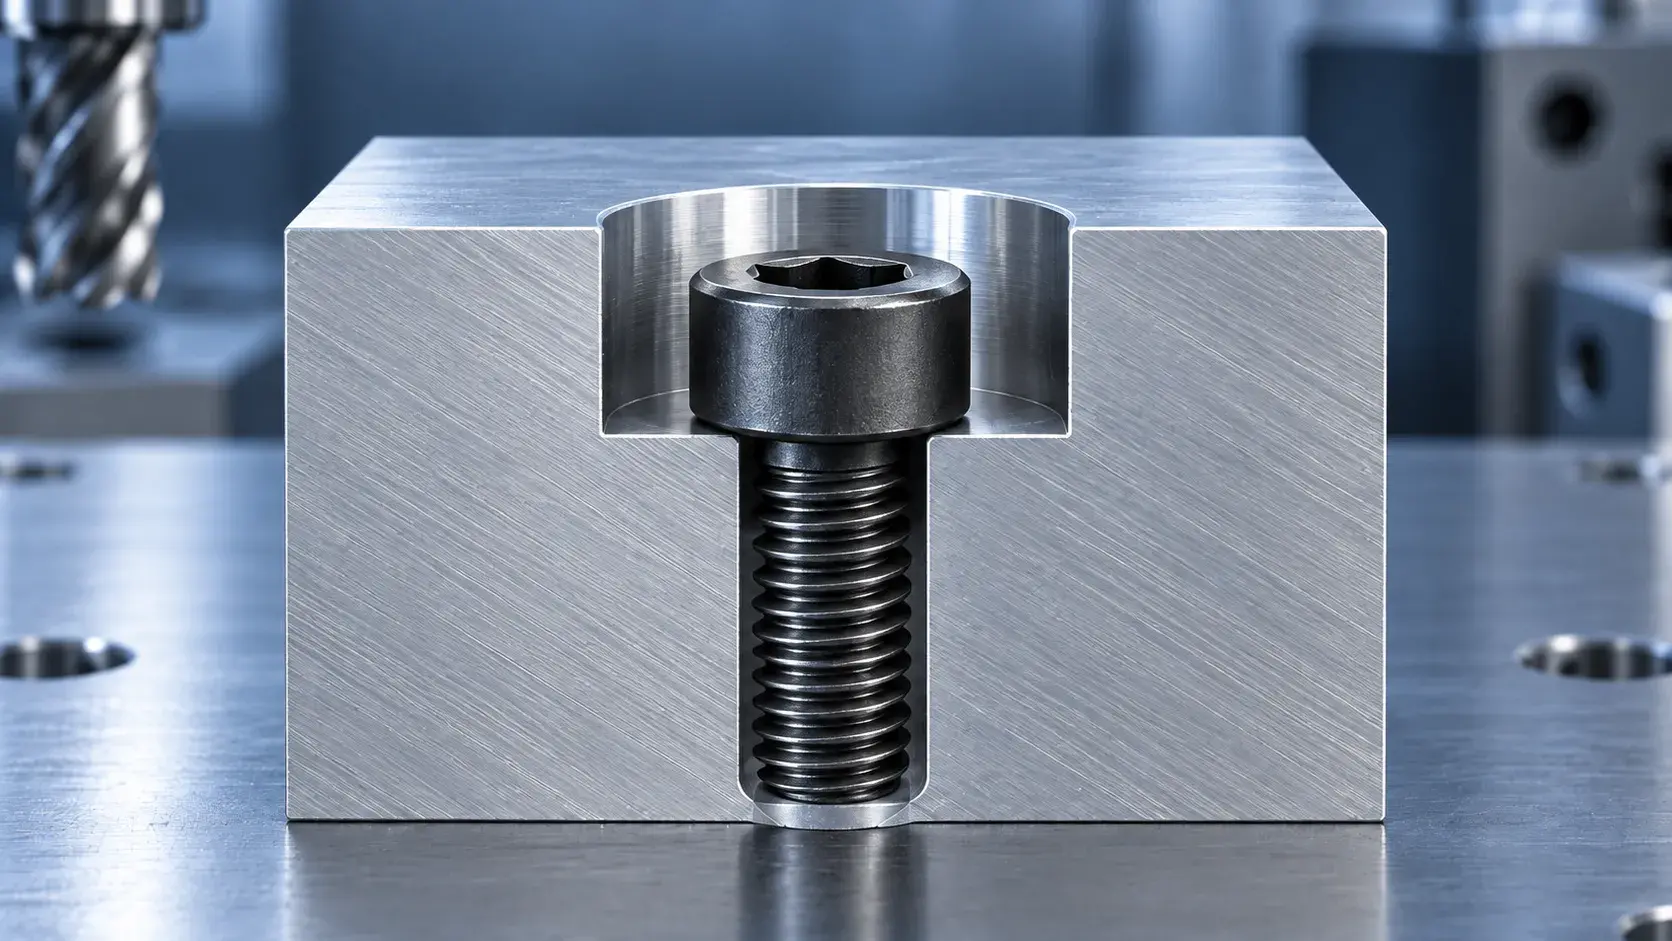
Counterbore hole with socket head screw

Counterbores are common in machine components, fixtures, brackets, housings, and structural parts where the fastener should not protrude above the surface.

For example, if a machine plate uses socket head cap screws, a counterbore can recess the screw head so the top surface remains clear for other components.

The main dimensions normally include:

  • Through-hole or pilot-hole diameter
  • Counterbore diameter
  • Counterbore depth

The depth is important because it determines how far the fastener head sits below the surface.

What Is a Countersink Hole?

A countersink is a conical recess machined around the opening of a hole. It is designed mainly for flat-head or countersunk screws.
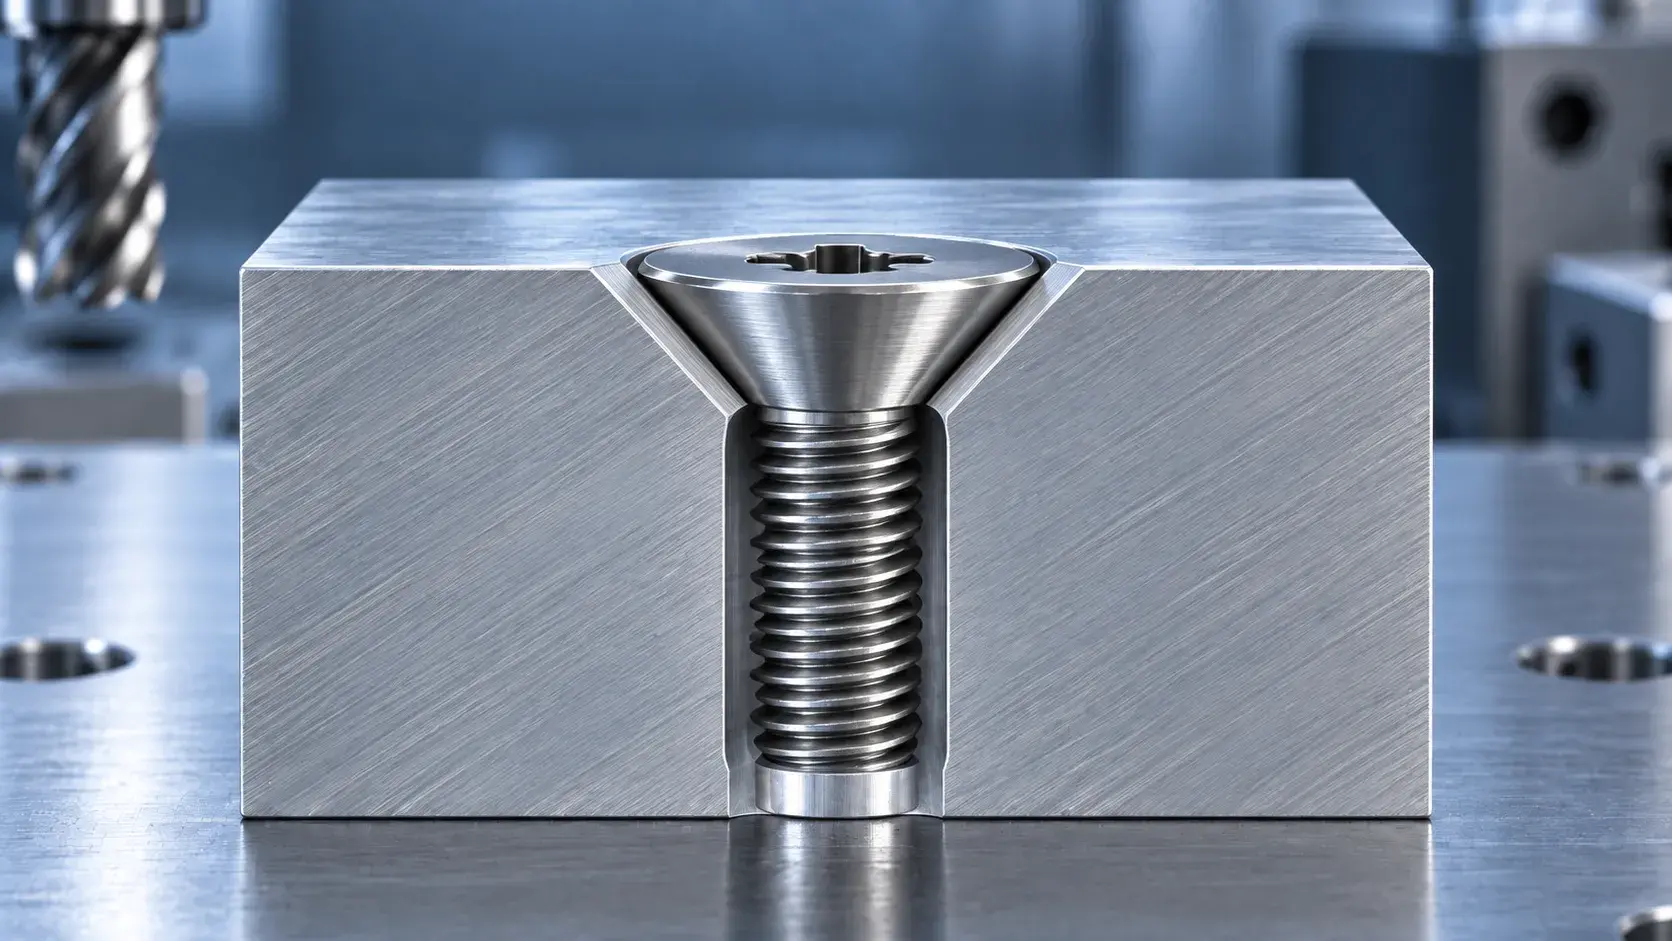
Countersink hole with flat head screw

When the angle and depth are correct, the screw head can sit flush with the surrounding surface.

This makes countersinks useful when a smooth surface is important, such as on:

Countersink holes are usually defined by the hole diameter, countersink diameter, and included angle.

Common countersink angles include 82°, 90°, and 100°, depending on the fastener standard and application.

The countersink angle should always match the angle of the screw head. If they do not match, the screw may contact only part of the surface and may not seat correctly.
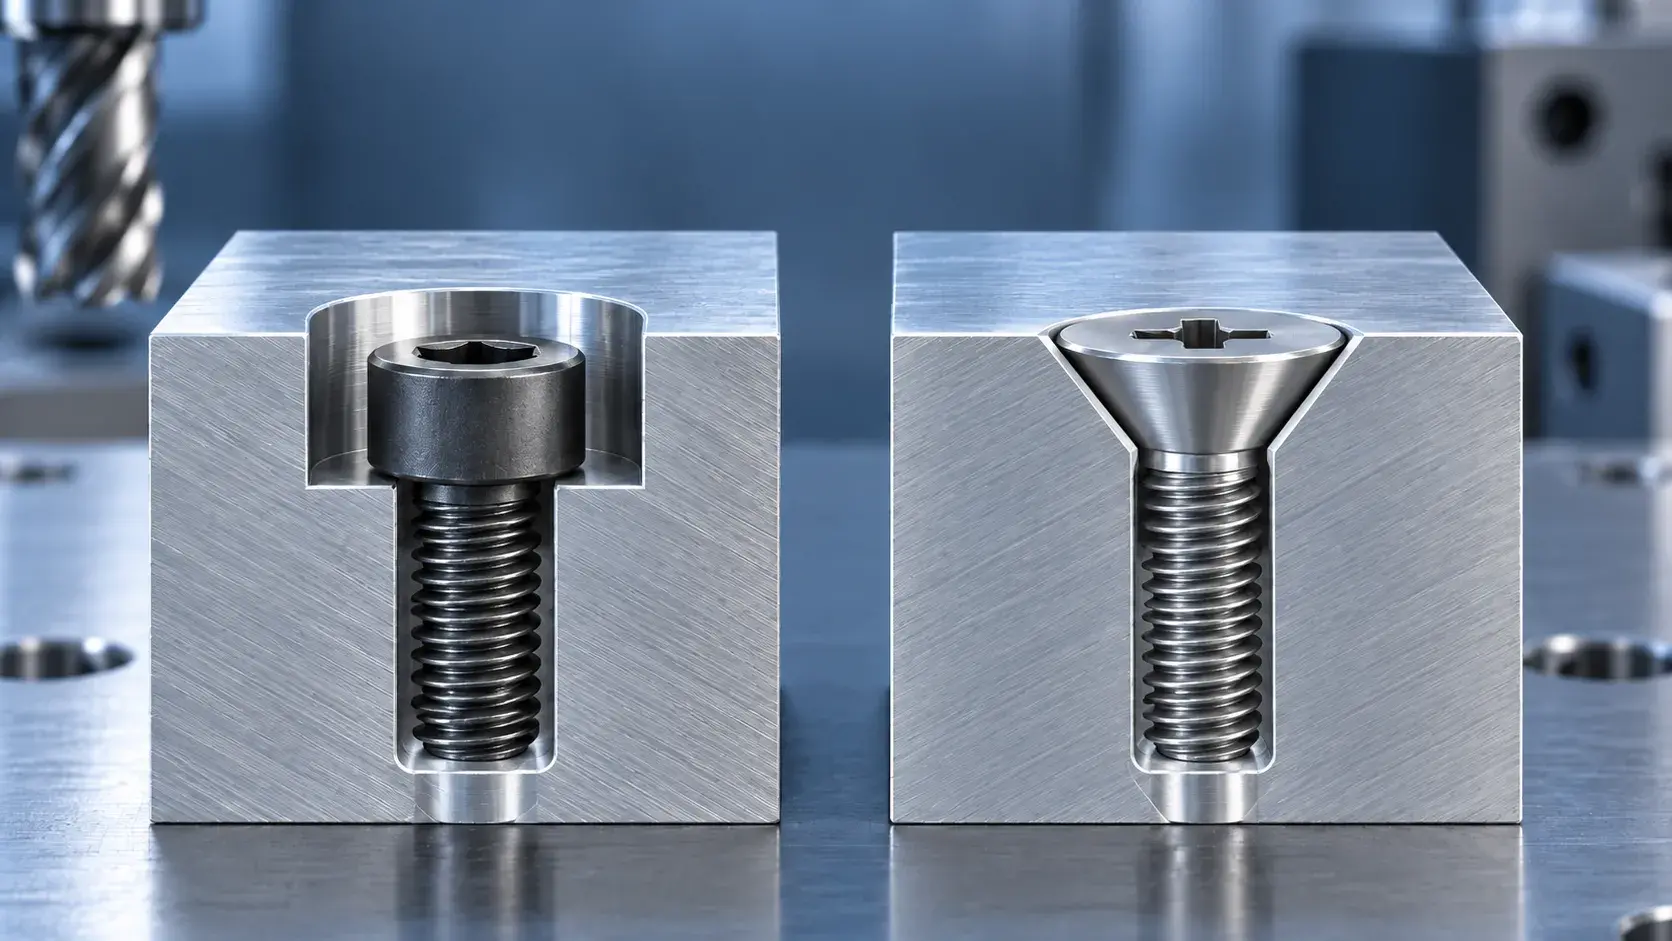
What Is the Difference Between Counterbore and Countersink?

Counterbore vs countersink hole comparison

Although both features recess a fastener head, their geometry and applications are quite different.

Shape

A counterbore has vertical walls and a flat bottom.

A countersink has a tapered or conical surface.

This is the easiest way to identify the two features on a drawing or machined part.

Fastener Type

Counterbores are commonly used with socket head cap screws and other fasteners with cylindrical heads.

Countersinks are normally used with flat-head screws that have tapered undersides.

The fastener should usually be selected before the recessed hole is designed.

Fastener Position

A countersunk screw normally sits flush with the top surface.

A screw inside a counterbore may sit flush or below the surface, depending on the required depth.

If the main goal is a completely smooth external surface, a countersink is often the better choice.

Bearing Surface

A counterbore provides a flat bearing surface under the screw head.

A countersink provides angled contact around the tapered screw head.

This difference can matter in assemblies where load distribution or precise seating is important.

Material Thickness

Counterbores remove more material through their full recess diameter.

For thin parts, a deep counterbore may leave too little material at the bottom.

Countersinks can sometimes work better in thinner sections, but the available material thickness still needs to be checked carefully.

Machining Method

Counterbores can be produced using a dedicated counterbore tool, end mill, or circular interpolation on a CNC milling machine.

Countersinks are normally produced using countersink cutters or chamfer tools.

Both are simple features, but poor tool selection or incorrect cutting conditions can affect the final quality.

Counterbore vs Countersink: Which Should You Choose?

The correct choice mainly depends on the fastener and the required surface condition.

Design RequirementRecommended Feature
Socket head cap screwCounterbore
Flat-head screwCountersink
Screw head below surfaceCounterbore
Screw head flush with surfaceCountersink
Flat bearing surface requiredCounterbore
Smooth cosmetic surfaceCountersink
Machinery or fixture assemblyCounterbore
Sheet, panel, or coverCountersink
Limited part thicknessCheck geometry carefully
Easy tool access is importantEither, depending on fastener

A simple rule is:

Choose the fastener first, then design the hole around the fastener.

Trying to select the recess first can create unnecessary tolerance, depth, or fit problems later.

CNC Machining Counterbore and Countersink Holes

Both counterbores and countersinks are easy to machine with CNC equipment, but maintaining consistent dimensions still requires correct tooling and process control.
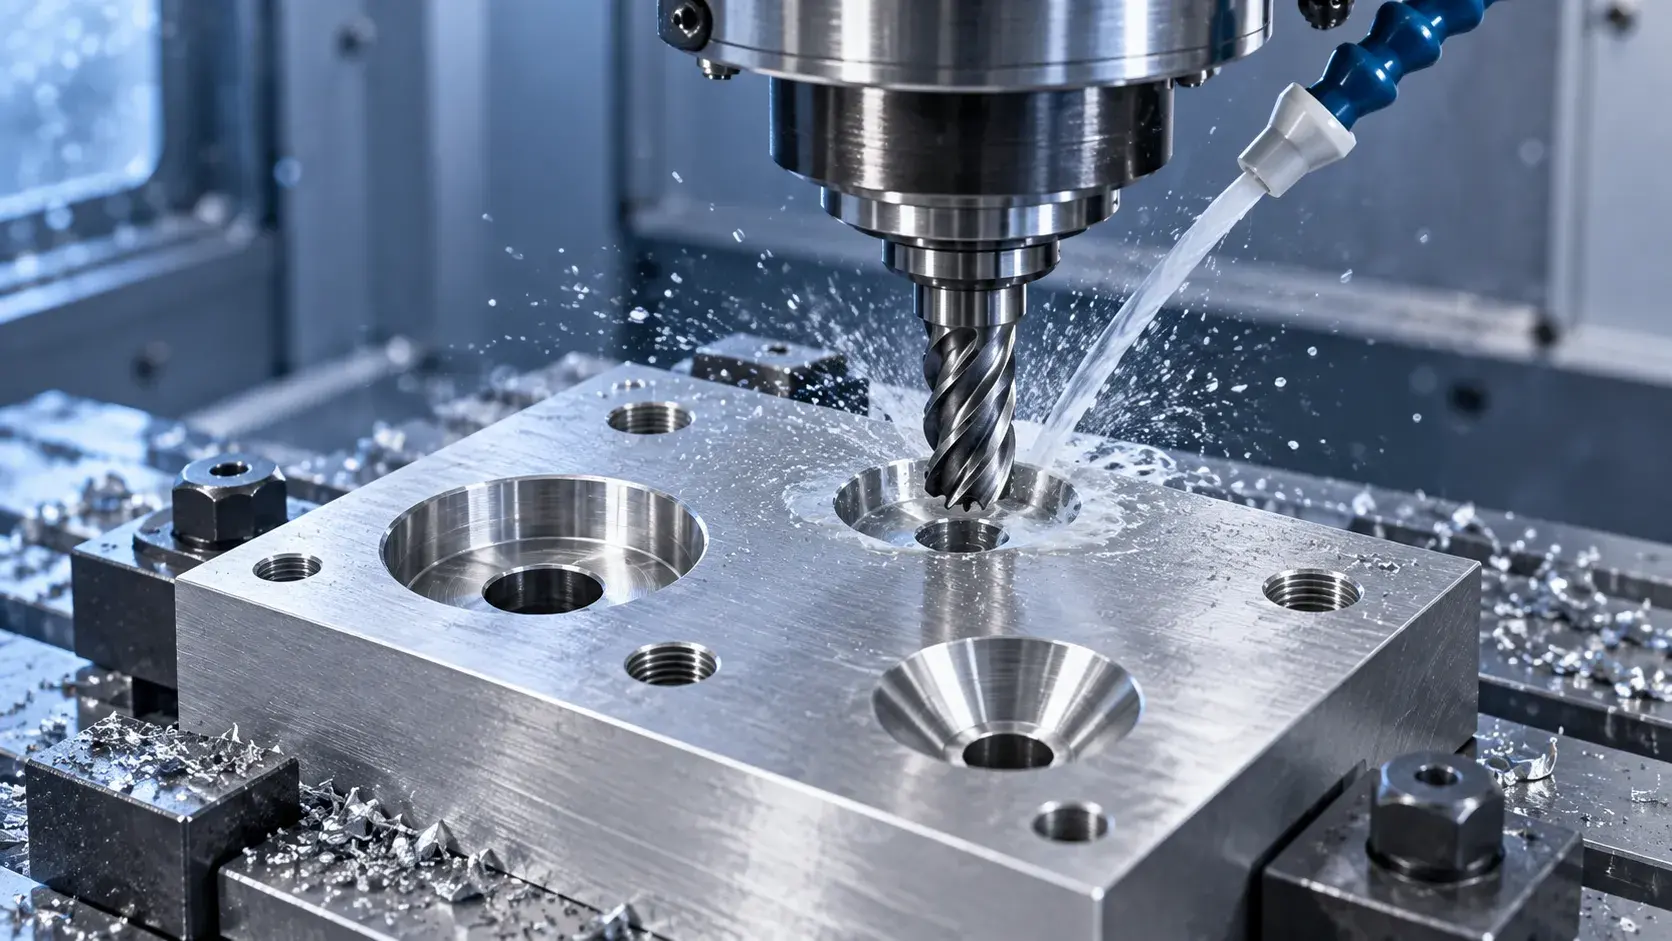
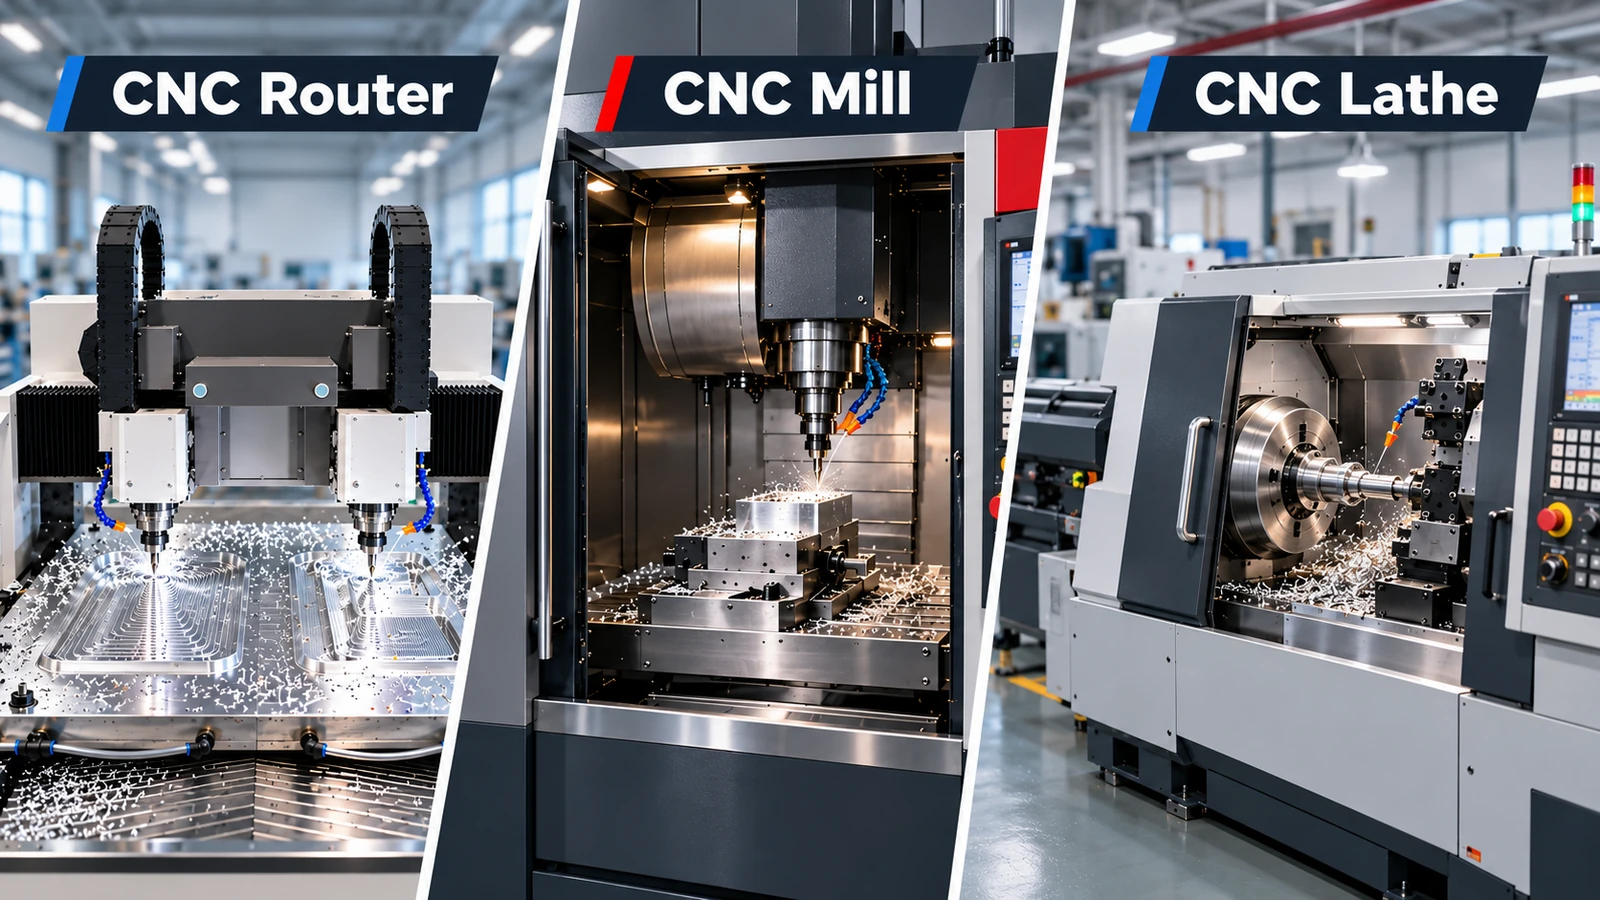
CNC machining counterbore and countersink holes

Machining Counterbores

A counterbore may be machined using a counterbore cutter, an end mill, or helical interpolation.

Important features to control include:

  • Diameter
  • Depth
  • Flatness of the bottom
  • Position relative to the drilled hole
  • Burr formation

If the depth is too shallow, the screw head may remain above the intended position.

If the counterbore is too deep, unnecessary material is removed and the remaining wall may become too thin.

Machining Countersinks

Countersinks are commonly machined with chamfer mills or dedicated countersink tools.

Common problems include:

  • Chatter marks
  • Uneven surface finish
  • Incorrect angle
  • Oversized countersink diameter
  • Burrs
  • Screw sitting too high or too deep

Chatter is especially common when the tool has poor rigidity or cutting parameters are not suitable.

For applications with visible surfaces or tight fastener seating requirements, the countersink should be inspected carefully after machining.
DFM Tips for Counterbore and Countersink Holes

Good hole design can reduce machining time, inspection work, and unnecessary cost.

1. Select the Fastener Before Designing the Hole

Start with the exact screw or bolt you plan to use.

The head diameter, head height, and angle will determine the required counterbore or countersink geometry.

2. Match the Countersink Angle to the Screw

Do not assume all flat-head screws use the same angle.

For example, different screw standards may use 82°, 90°, or 100° heads.

The drawing should clearly specify the required angle.

3. Avoid Excessively Tight Tolerances

Most recessed screw holes do not need extremely tight dimensional tolerances.

Tighter tolerances can increase tool changes, inspection time, and machining cost without improving the actual function.

Only specify tight tolerances when assembly performance really requires them.

4. Check Remaining Wall Thickness

A deep counterbore or large countersink can remove a significant amount of material.

Always check the remaining thickness under and around the hole, especially near thin walls and edges.

This is particularly important for aluminum housings, brackets, and lightweight parts.

5. Keep Holes Away From Edges When Possible

Placing a large counterbore too close to an edge can break through the side wall.

Countersinks near edges can also create thin sections or incomplete conical surfaces.

If possible, leave enough surrounding material for stable machining and reliable fastening.

6. Use Standard Sizes

Standard screw sizes and standard tool angles are easier and cheaper to manufacture.

Custom recess diameters or unusual angles may require special tooling or additional machining steps.

How to Call Out Counterbore and Countersink on a Drawing

Clear drawing callouts help prevent manufacturing mistakes.

A counterbore callout normally includes:

  • Hole diameter
  • Counterbore symbol
  • Counterbore diameter
  • Counterbore depth

A simplified example may look like:

Ø6 THRU, C’BORE Ø10 × 5 DEEP

This tells the machinist that the smaller hole passes through the part, while the larger counterbore is 10 mm in diameter and 5 mm deep.

A countersink callout normally includes:

  • Hole diameter
  • Countersink symbol
  • Countersink diameter
  • Included angle

For example:

Ø6 THRU, CSK Ø12 × 90°

This specifies a 6 mm through hole with a 12 mm diameter, 90-degree countersink.

The exact drawing format may vary depending on the drafting standard used, but the important point is to provide enough information to define the feature without ambiguity.

Do Counterbore and Countersink Holes Cost More to Machine?

Both features usually add some machining time compared with a simple drilled hole because they require another toolpath or cutting operation.

However, the cost difference is often small for standard geometry.

Cost may increase when a part has:

  • Large numbers of recessed holes
  • Very tight depth tolerances
  • Non-standard countersink angles
  • Deep counterbores
  • Difficult-to-machine materials
  • Poor tool access
  • Very small features
  • High cosmetic requirements

Counterbores may require more material removal, while countersinks may require extra attention to surface finish and seating depth.

The most cost-effective design is usually the simplest geometry that still meets the assembly requirement.

Common Design Mistakes to Avoid

Several problems appear frequently in recessed hole designs.

One common mistake is selecting the wrong countersink angle for the screw. This prevents full surface contact and can cause poor seating.

Another is making a counterbore deeper than necessary. Extra depth adds machining time and removes material without providing any functional benefit.

Designers should also avoid placing large recessed holes too close to thin walls or edges.

Finally, dimensions should be based on real fastener specifications rather than rough estimates.

Counterbore vs Countersink: Final Choice

Choose a counterbore when you need a cylindrical recess, a flat bearing surface, or space for a socket head screw below the surface.

Choose a countersink when you need a flat-head screw to sit flush with the surface.

For CNC-machined parts, both features are straightforward to manufacture when the fastener, angle, diameter, depth, and surrounding wall thickness are clearly defined.

Good recessed-hole design is less about choosing one feature as “better” and more about matching the hole geometry to the fastener and the function of the assembly.

Frequently Asked Questions

Yes. An existing drilled hole can usually be countersunk afterward as long as there is enough surrounding material and the hole position is accurate.

Yes. Counterbores can be designed large enough to accommodate both the fastener head and washer, but the required diameter and depth must be specified correctly.

Yes, but the available material thickness must be checked carefully. A large or deep countersink may remove too much material from a thin section.

Common causes include insufficient countersink diameter, incorrect depth, or a countersink angle that does not match the screw head.

It is generally clearer to specify the countersink diameter and angle. These dimensions define the geometry more directly and reduce interpretation errors during machining.

Table of Contents
Discuss Your Complex Machining Requirements

Need Custom CNC Machined Parts?

From rapid prototypes to low-volume production, our engineering team can review your drawings and provide a manufacturing quote.

  • 24-Hour Quotation
  • DFM Engineering Support
  • No Minimum Order
  • ISO 9001 Certified
Request A Quote
Upload your drawing and get a quote within 24 hours.